How to Install a USB Wall Charger Outlet
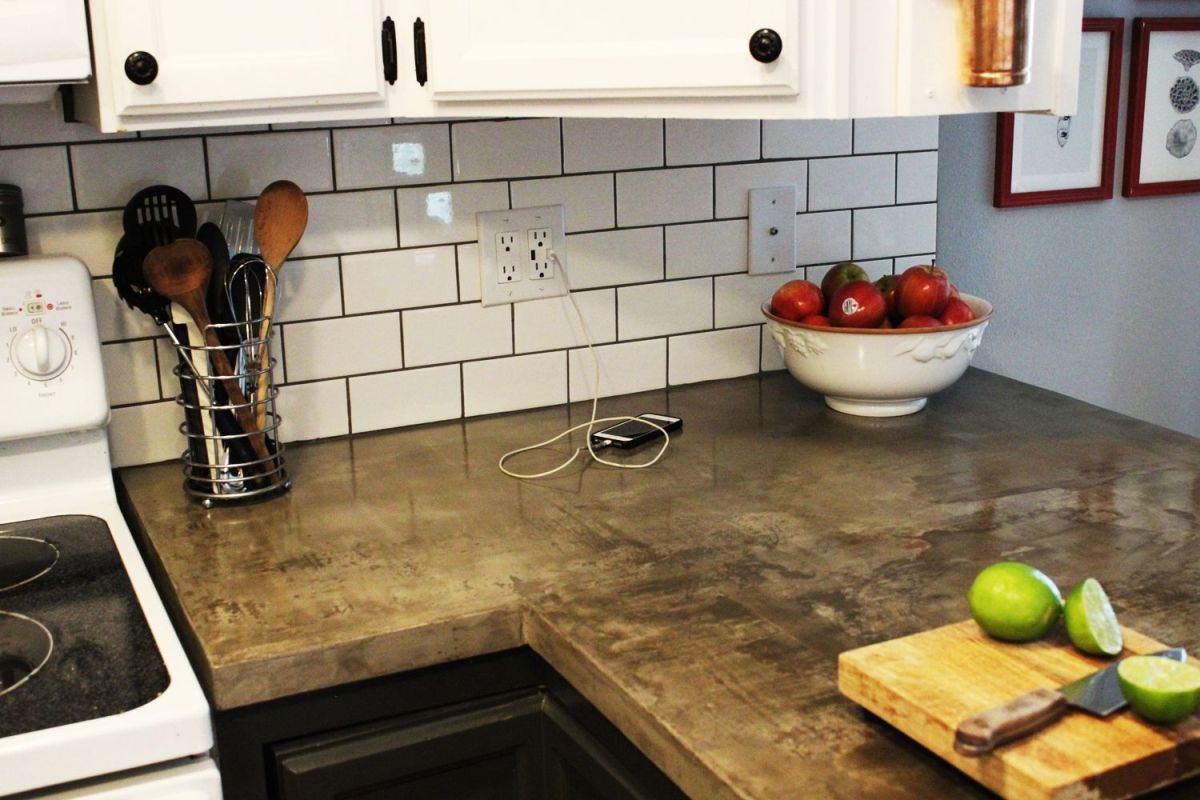
In this digital age, it tin can be a challenge to assistance an older home go along up with our ever-increasing technological needs. For example, do you have more devices that need charging than you have bachelor outlets in convenient, accessible locations? We had just a 1-gang (two outlets) electric setup in a prime spot in our kitchen, which but wasn't plenty when the blender, griddle, Bose speaker, iPad, and telephone all needed electricity simultaneously. It became apparent that we needed to update our electrical state of affairs, stat.
 View in gallery
  View in gallery
 This tutorial provides footstep-by-footstep instructions on how to take a standard 1-gang outlet (with 2 available openings) and expand it to a 2-gang outlet (with iv available openings) PLUS two USB connectors. And the good news is, it'southward a quick and relatively like shooting fish in a barrel commutation…with far-reaching benefits. Ready? Allow's do it.
*Note: The author is an experienced, but not professional, habitation improvement enthusiast. Neither the writer nor Homedit is responsible for whatever potential damages or harm caused during the procedure of following this tutorial.
DIY Level: Beginner to intermediate
 View in gallery
 Materials Needed:
- *(not all materials are shown; change this listing equally appropriate for your needs and setup)
- Front-blast 2-gang electrical box(the blue plastic ones for interior), DEEP – 38 cubic inches
- A one-gang USB charger outlet (these are a bit more than expensive than standard outlets, but worth the space-saving functionality!)
- A rectangle-faced 1-gang standard outlet
- A rectangle-slotted ii-gang outlet face plate
- Razor blade, drill, screwdriver
 View in gallery
 Identify the outlet needing to be expanded and/or upgraded to a USB charger outlet. Flip the breaker to this outlet and double check that at that place is no electricity running to this outlet. Remove the face up plate.
 View in gallery
 Remove the outlet (and whatsoever spacers) by unscrewing the top and lesser outlet screws.
 View in gallery
 Gently pull the outlet away from the blue electrical box and unscrew the wires from the outlet.
 View in gallery
 Next we'll be removing the blue electrical box and installing a two-gang box. If your drywall is already removed (check out this tutorial for removing drywall), the side by side few steps volition be adequately like shooting fish in a barrel to do. If your drywall is all the same intact, you'll need to place which side of your outlet has the stud. Then you will need to utilise a drywall saw to cutting the drywall on the non-stud side of the outlet box to the width of your new blueish double electrical box.
 View in gallery
 Using a flat screwdriver, loosen the nails attaching the blue box to the stud. These are generally found at an angle on the top and lesser of the blue box.
 View in gallery
 Pull out nails, and then remove the blue box. Unhook wires from the box every bit you lot pull it out.
 View in gallery
 The wires will stay in the wall. (I'm stating the obvious, just in case.)
 View in gallery
 Grab your new 2-gang blueish box. A couple of things about what you desire to make sure of: (ane) Your box can be forepart-nailed to the stud. This prevents damage to existing insulation. An exception to this recommendation is if your drywall is not already removed during this procedure; if that is the example, you lot might want to use a standard electrical box and deal with the insulation harm rather than mess with having to remove bits of drywall and so supersede them. (2) Your box is extra deep. Nosotros recommend a 38 cubic inch box (many 2-gang boxes are smaller, like around 34 cubic inches). You demand that actress depth considering the USB outlet is deeper than standard outlets.
 View in gallery
 Hold the box up to the stud over the old box's hole, and marking where you want to cutting the insulation to.
 View in gallery
 Use a razor blade to cutting through and remove the insulation.
 View in gallery
 Your box should fit snugly and cleanly into the opening.
 View in gallery
 Employ a screwdriver and a hammer to remove the appropriate knockout (top or lesser, whichever direction your wires are coming from). You should only demand to remove one knockout of the smallest size (1/2").
 View in gallery
 Pull the wires through the knockout hole and insert your box next to the stud.
 View in gallery
 Mountain your box to the adjacent stud with wood screws. Predrilling is optional, but I more often than not recommend predrilling but to be safe.
 View in gallery
 Slice the insulation to fit the box "wings." Insulation should be apartment and shine around all edges subsequently box is installed.
 View in gallery
 Using wire pliers, straighten the ends of the wires in the box.
 View in gallery
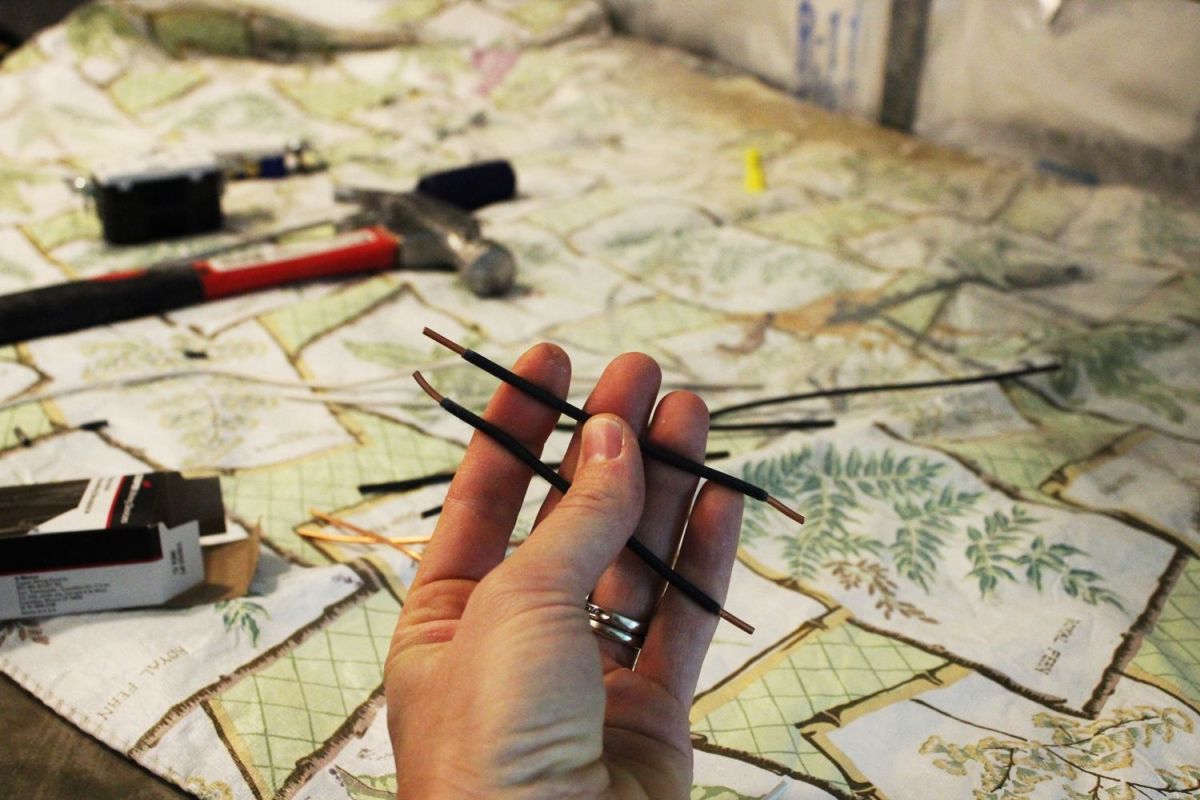
 Yous will now need to cut 2 (each) strips of 12-gauge wire in black and white, each most iv"-6" in length.
 View in gallery
 Remove the end casings on both ends of both black and both white wire strips, nearly 1/2″ to 3/4″ in from the ends.
 View in gallery
 Your strips volition expect something like this.
 View in gallery
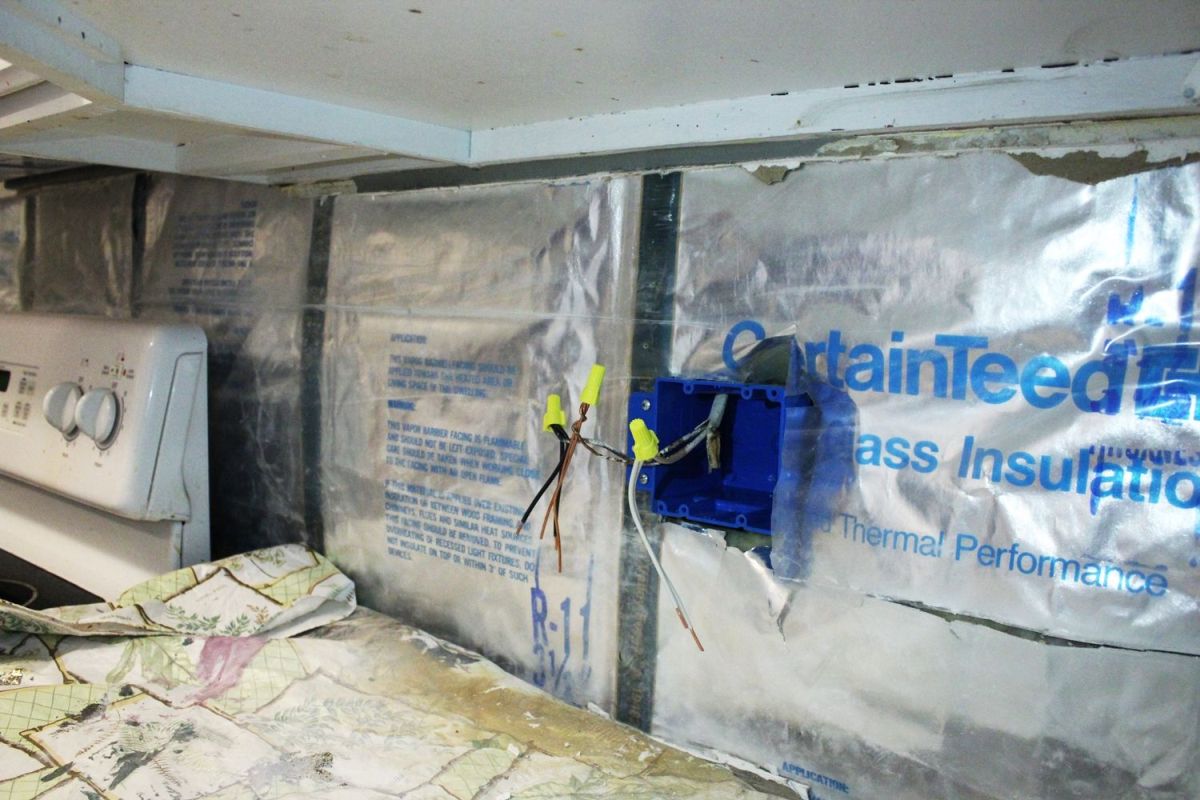
 The idea is that you will be doubling the number of outlets here, so y'all volition need two black wires and two white wires (and two ground wires) to attach to the ends of the existing blackness and white and basis wires, respectively.
 View in gallery
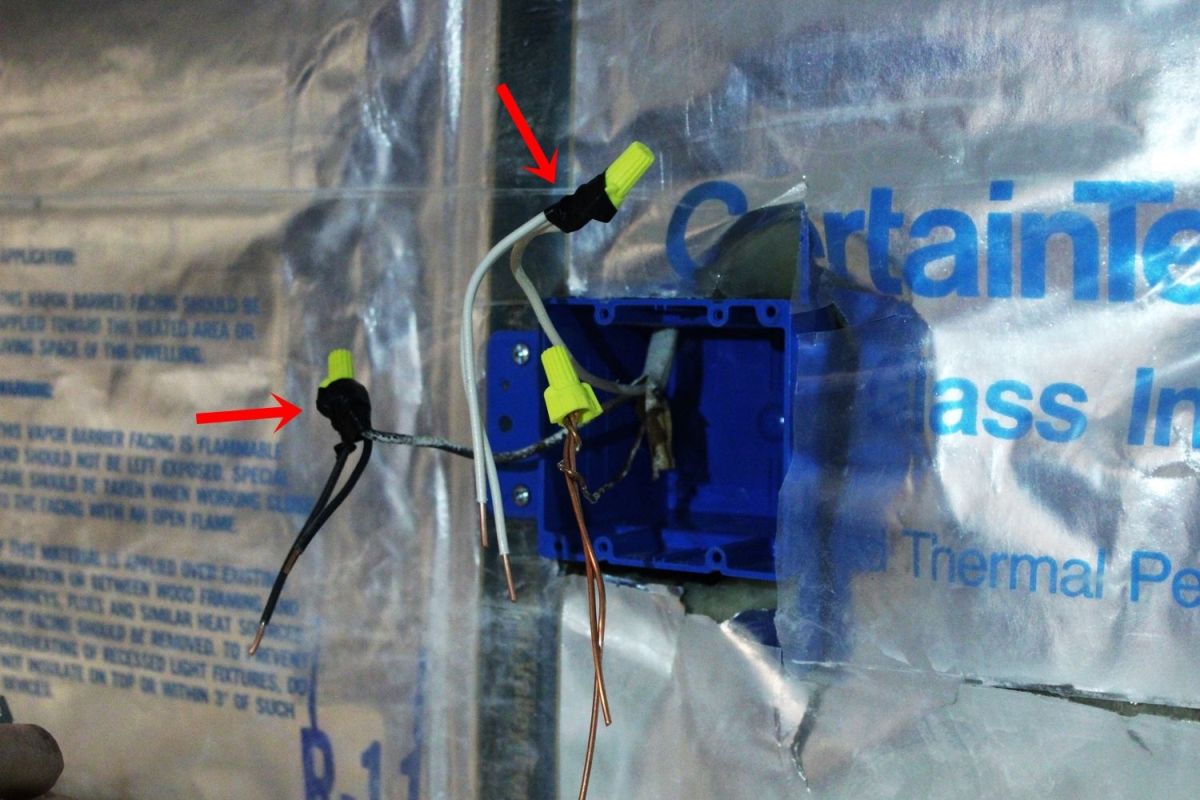
 To rephrase, each wire nut (the black, the white, and the ground) will combine the ends of 3 wires so that 2 wires of each are available for the two outlets.
 View in gallery
 Secure and protect the ends of the wire basics with electrical record. You don't need to use electrical tape for the footing wires, though.
 View in gallery
 Use needlenose pliers to bend the ends of the wires into a small semi-circle.
 View in gallery
 These curved ends will hook onto the screws on your outlets.
 View in gallery
 Friction match the black wire with the outlet's gold screws, the white with the silverish, and the ground (bare copper wire) with the light-green.
 View in gallery
 Hook the ends of the wires nether the advisable screw head, then tighten it down carefully with a screwdriver.
 View in gallery
 Later you lot've attached ane black, white, and ground wires to one outlet, you should have a blackness, white, and ground wire left to adhere to the second (USB charger) outlet.
 View in gallery
 Over again, match the black wire with the aureate screw, the white wire with silvery, and the ground/copper bare wire with green.
 View in gallery
 Your outlets should be firmly attached and ready to install in the electric box at this point.
 View in gallery
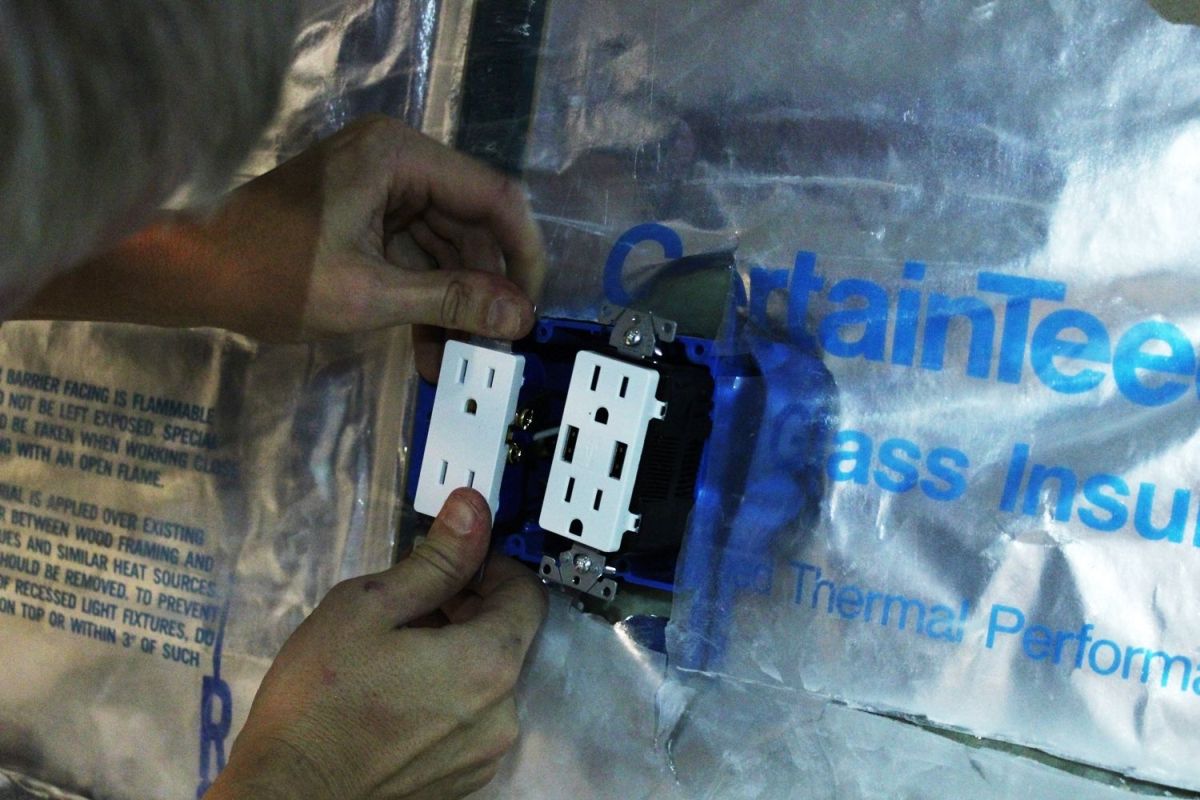
 Make certain the outlet "faces" are aligned in the direction you want, and then push button them into the box.
 View in gallery
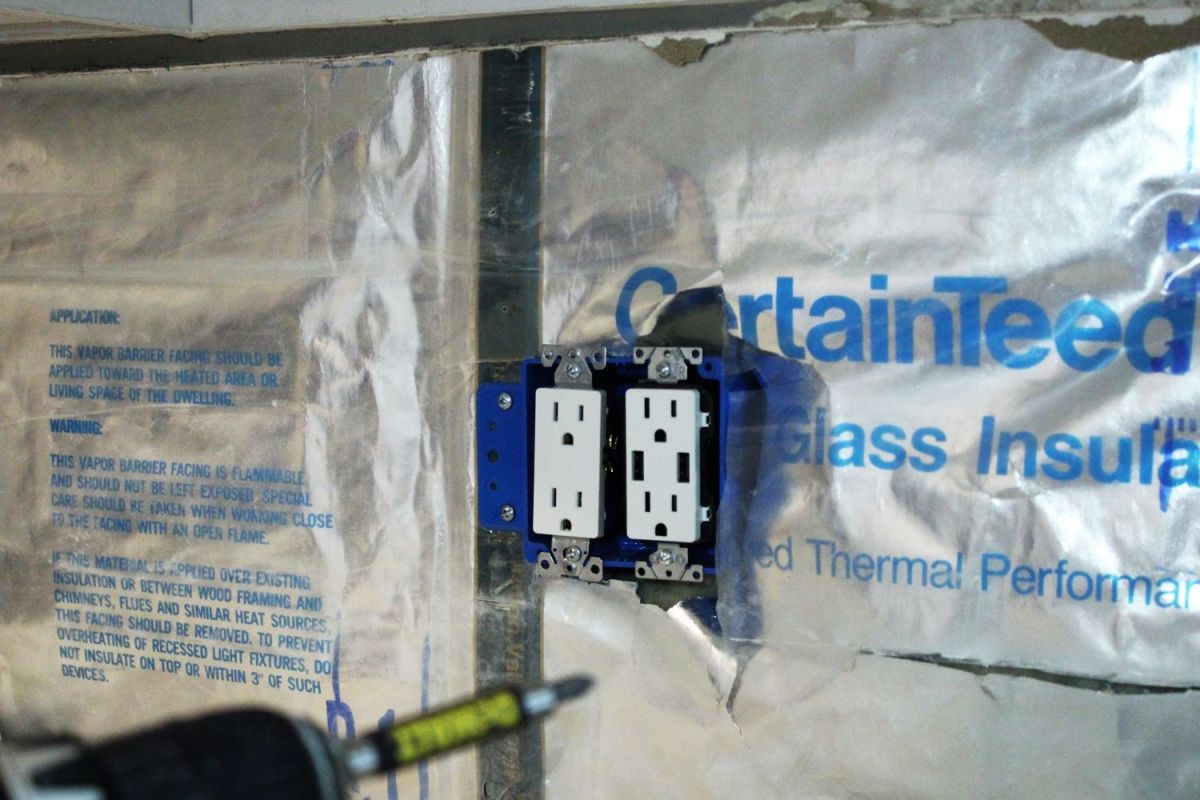
 Brand certain they are perfectly vertical and parallel, then screw the outlets in.
 View in gallery
 The USB charger outlet will stick out further than the standard outlet. You may opt to utilize a spacer backside the standard outlet to bring information technology forward always so slightly, although this is not necessary.
 View in gallery
 Install drywall around your new outlets. (Bank check out our tutorial onhow to install drywall.)
 View in gallery
 Install your tile or whatever else, if applicative, to the drywall. (Check out our tutorial on how to install a subway tile backsplash.) Then install the face plate.
 View in gallery
 Viola! Yous've done information technology. You lot merely freed up some serious gadget-charging space.
 View in gallery
 This is the offset, and probably concluding, time this iPhone will have the USB charger all to itself.
 View in gallery
 Enjoy your pocket-sized-but-important technological upgrade to your home!
Check out other tutorials in our DIY Kitchen Upgrade Series:
DIY Faux Concrete Countertops
How to Upgrade Your Kitchen Lighting
How to Remove Kitchen Tile Backsplash
How to Install a Subway Tile Kitchen Backsplash
How to Replace a Kitchen Faucet
Source: https://www.homedit.com/install-a-usb-wall-charger/
0 Response to "How to Install a USB Wall Charger Outlet"
Postar um comentário